Creating an Order
We have enhanced the process of creating orders in the Order Management application with a new order wizard. This facilitates order creation by streamlining three sections: Customer, Location. Each step will help you create orders and make decisions as per the customer's preferences.
The new iteration allows customers to order under different scopes.
| 1. | Click Create Order. |
Searching in the order wizard
The wizard automatically pops up when create order is clicked in the Orders tab.
Customer
When a customer is selected, the order wizard automatically brings up the fulfillment section, ready to be filled out.
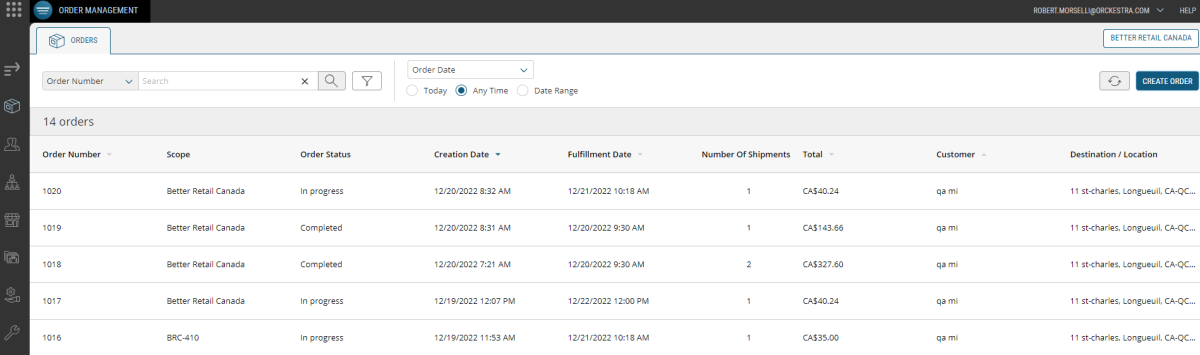
Figure 1 - Create order button
| 1. | Select and click a Customer. If the customer does not exist in the database, you can create a customer account (see Creating Customers in a New Order). You can use the search filters to locate the customer. |
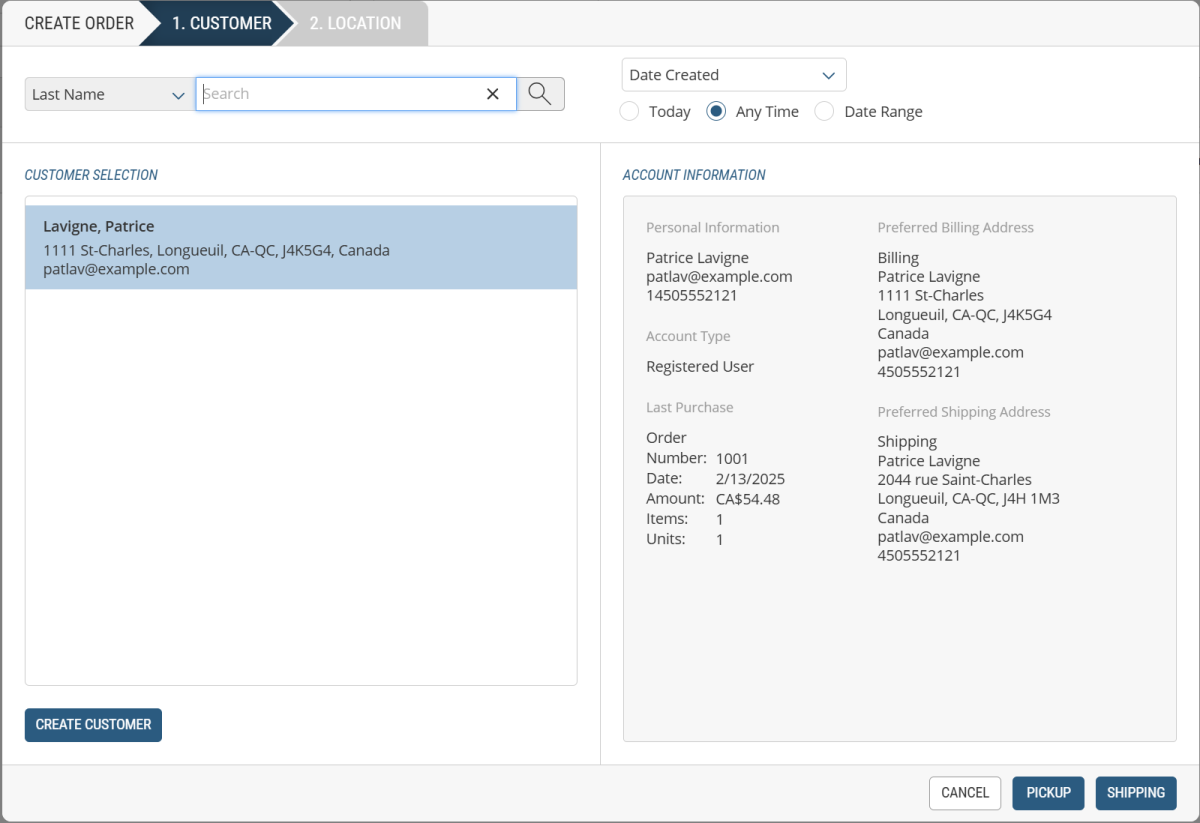
| 2. | Click Pickupor Shipping. |
This will lead to the Location section.
Use the Search Field to efficiently conduct location searches. The searches can include inputs such as store name, store number, Scope ID and postal code.
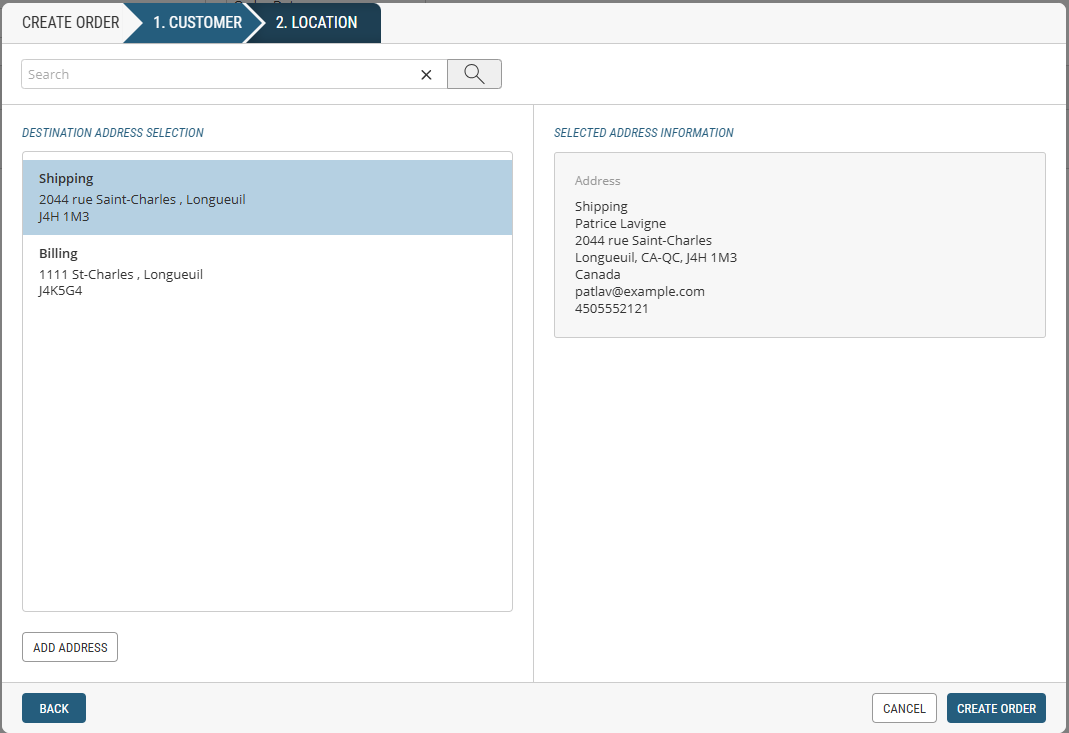
| 3. | Click Create Order. |
Completing order details
| 1. | In the Items tab, add items using their Product |
| 2. | Products will appear under the shipment header. |
Store Fulfillment options that are specified in the shipment header will determine the fulfillment processing and order routing that occurs when creating or modifying an order.
| 3. | Click the Fulfillment section, complete the fulfillment options. |
Note: The fulfillment location can be revised (under the Fulfillment tab) if the wrong order location was selected while using the Order Wizard.
| 4. | Click the Payment section, select a Payment Method. |
Note: if the customer account doesn't have an address specified, click the Specify Address option to enter the address, otherwise, the Payment Option drop-down won't be selectable.
| 5. | In the Discounts section, you can add a promotion to the order, if applicable. |
During order creation, the system records details of all the promotions that impact the cart and assigns the proper discounts that currently apply. It is not possible to update promotions once the order is submitted.
| 6. | In the Attributes section, complete the order attribute information, if applicable. |
When there is missing or incorrect information in your order, tabs are highlighted by the icons to identify the areas that require attention. Be sure that these issues are resolved before submitting your order, otherwise you will not be able to submit it.
| 7. | Click Submit. |
You can only submit orders that contain back order items when the Back Order check box has been selected in the Product Administration configuration. Any items that have an Out of Stock status will prevent the order from being submitted.
The submitted order appears on the page with an order number and a new status.
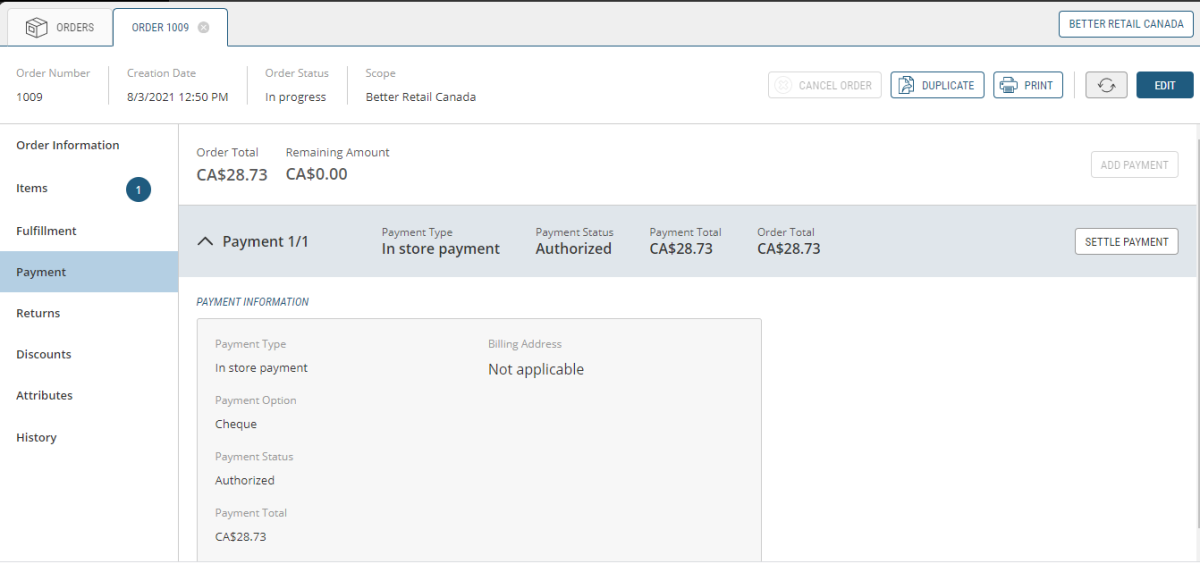
Figure 2 - Submitted order
Location
Depending on how the store's custom attributes are indexed, you can search by different types of keywords to locate a store. For example: custom attributes such as store name, store number, Scope ID, phone number/regional code, postal code could be indexed to facilitate the search. By accepting a broad range of indexed custom attributes, you can now efficiently conduct searches to locate stores or fulfillment locationsin the wizard.